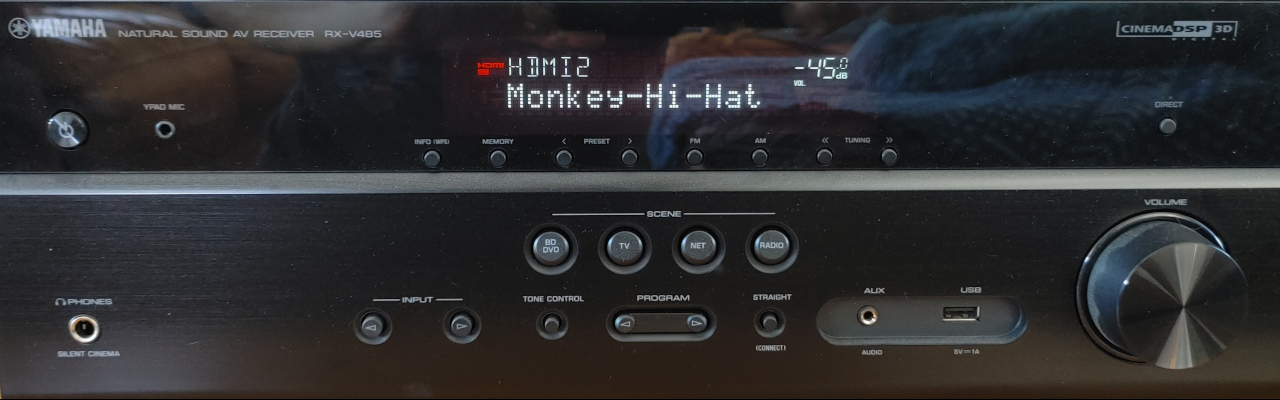

Inside the Monkey Hi Hat Music Visualizer
A look at how the visualizer application works.
When I first wrote the Monkey Hi Hat introductory article just a few weeks ago, the application was still in the version 1.x release range. Yesterday I finally released version 2.0, which greatly improves maintainability, adds some great new features, and paves the way for some other changes I hope to make relatively soon.
While I was actively working on those changes, I debated whether to continue focusing on the 1.x series because that’s where the articles began, but now that I’m done, the new code is such a major improvement that it only makes sense to look at the current state. I will note, however, that the underlying eyecandy library that intercepts music playback and generates audio textures is still generally as described in the 1.x article, even though it has undergone some internal revisions that I felt warranted a v2.0 release.
The new version brings two changes to the requirements. The application is only 64-bit now, and it only supports the full OpenGL version 4.6 API (which has been current for more than five years).
Startup and Control
Although it is a graphics program, Monkey Hi Hat doesn’t have a graphical interface – at least, not as part of the application itself. There is a stand-alone remote-control GUI, Monkey Droid, which runs on Windows 10/11 or Android. It can control a PC running Monkey Hi Hat over the local network. Binaries are available on the Monkey Hi Hat release page linked earlier. You can also issue commands via an SSH terminal session (refer to the repository wiki if you need help setting this up).
OpenGL and OpenAL interaction is achieved through native-library wrappers provided by the OpenTK library. That library also wraps the cross-platform GLFW (OpenGL Framework for Windowing) native-libraries. Monkey Hi Hat is technically a console program and windowing is managed by GLFW.
Like all .NET console applications, the static Program class is home to the main() entrypoint. The class also exposes to very important fields: AppConfig and AppWindow. It was necessary to read configuration fairly early in the app lifecycle, so there was little harm in exposing it in this very basic fashion. The window object has to be created, started, and disposed by the main console loop, so it also made sense to make it readily available in this way.
The main() method performs the following tasks:
- Loads the configuration file (
mhh.conf, ormhh.debug.confin VS debug mode) - Initalizes logging via Serilog
- Tries to pass any command-line switches to a running instance via CommandLineSwitchPipe
- Sets up a command-line switch server if a running instance isn’t found
- Prepares eyecandy’s audio and visual configuration objects
- Creates the
HostWindowobject and invokes theRun()method and blocks, waiting for exit - Performs disposal and other cleanup tasks like cancelling tokens to end background threads
Log output goes to mhh.log in the application directory by default. Each new run will overwrite any previous log. You can control the log levels in the mhh.config file. The program can be fairly “chatty” at anything settings lower than Warning or Error.
The Program class is also home to several simple helper functions, most of which are used by the ProcessExecutionSwitches method, which receives commands at runtime via named pipe or TCP from the command-line switch server. I won’t go into the commands here (you can read about them on the repository wiki), but they allow the user to load new playlists or visualizers, retrieve content lists and status information, and so on.
It is important to remember that these will be invoked on a separate thread (where the command-line switch server is running), which means some of the operations that interact with HostWindow must be handled in a thread-safe fashion.
Reading Configuration Files
Monkey Hi Hat uses a simple ini-like syntax for .conf configuration files. They can be separated into [sections] and the contents of a section can either be a list of strings that are stored in the same order they appear in the file, or a list of key=value pairs. These are organized into nested dictionaries. The outer key is each section name, and the inner dictionary is either the key/value pair, or the string list with an incrementing integer key to maintain sequence. All of this processing is handled by the ConfigFile class.
Three specific configuration file formats are defined, ApplicationConfiguration, VisualizerConfiguration, and PlaylistConfiguration, and their purposes are obvious from their names. Their constructors create and store a ConfigFile object, then use various query and default-setting extensions to set the various properties that correspond to those file formats.
Some of the extensions are a little interesting. For example, this line of code checks the nested dictionary for the requested section and setting (key), and either converts the value to an enum or returns the specified default enum:
1
2
3
Order = ConfigSource
	.ReadValue("setup", "order")
	.ToEnum(PlaylistOrder.RandomWeighted);
You can find all of the program’s extensions in the cleverly-named Extensions class in the Utils/Global project directory.
Currently the PlaylistConfig class also has a pair of helper functions, GeneratePlaylist (which implements things like randomization) and LoadNames (which finds the visualizer config files within the playlist). These will probably be moved into PlaylistManager in a future release, they’re in the config class as an artifact of the version 1 code which had no manager.
Application Window
One of the major goals of version 2.0 was to dramatically simplify the code in HostWindow. Most functionality was offloaded to classes like PlaylistManager, RenderManager, and GLResourceManager, and a great deal of state information was centralized into a static Caching class. In the future, I may take this one step further and also offload all the supporting methods the Program object uses to interact with the running application when new command-line switches are received.
The constructor initializes the eyecandy audio texture engine, creates instances of all seven of the currently-available audio texture types, initializes the cache, and kicks off the default idle visualizer (choosing a more interesting idle visualizer is on my to-do list). The class is a subclass of the eyecandy BaseWindow which handles a few minor chores like starting full-screen.
The eyecandy library allows the library consumer to create, enable, disable, and destroy instances of audio texture types, but to my surprise, the overhead of simply running all of the available texture types simultaneously is almost immeasurably insignificant on modern hardware. That code runs on its own thread, and even on laptop-class hardware, it ticks along happily processing 23ms chunks of audio into seven OpenGL texture buffers. To be fair, the buffers are pretty small (five are 1024 x 128 32bpp, a little over half a megabyte each, and the other two are merely 4K and just 512 bytes, respectively), but combined they’re writing about 7,000 floats into multiple buffers and invoking OpenGL texture operations inside synchronous lock regions, in addition to all the FFT and other audio post-processing … every 23 milliseconds. Modern hardware is amazing.
Apart from the event handlers, the remainder of HostWindow consists of helper functions called by Program when new commands arrive, and some simple internal helper functions. These are generally self-explanatory, the handlers are where the interesting work happens. The window class overrides just four of the OpenTK / GLFW / eyecandy BaseWindow event-handlers.
OnLoad
The OnLoad event tells OpenGL to enable a feature called ProgramPointSize, then directs the eyecandy audio texture engine to begin processing audio data. The OpenGL feature call was necessary in version 2.0 because of the change to OpenGL 4.6 API support. Earlier versions supported OpenGL ES 3.x which has that feature enabled by default. Without that feature, the VertexShaderArt-style visualizations that draw OpenGL points which shaders that set the gl_PointSize variable wouldn’t work correctly. Instead of points of varying size, the driver would only draw points that were a single pixel.
OnRenderFrame
Considering this is the heart of Monkey Hi Hat, there is surprisingly little code here. First, a couple of fast-exit flags are checked. Then the public ResolutionUniform value is re-created from the current viewport dimensions, the eyecandy engine is invoked to update audio texture data (which only happens if the audio buffers have actually changed; some of the shaders can run at 4000 to 5000 FPS on my desktop machine, which means new data is only available every 8 or 10 frames), the rendering manager is called to render a new frame, the OpenGL SwapBuffers command is invoked, and a simple frame-rate calculator is called.
It’s worth noting that the eyecandy texture update doesn’t need lock protection. The background thread that samples and processes audio data uses double-buffered Interlocked.Exchange process so that any data referenced by the foreground process is not at risk of simultaneous access from the background process.
And that’s it. Everything else of interest happens Somewhere Else.
OnUpdateFrame
The OpenTK documentation states that this event is meant for non-graphical processing. Monkey Hi Hat performs all “housekeeping” chores in this event handler.
First, it simply checks to see if the --quit command was received. If so, the rendering manager is disposed and the window is closed. The window’s Dispose method called from Program.main() handles shutdown and cleanup of other resources like the eyecandy engine.
Next, if the user has pressed the ESC key, the same quit flag checked above is set and processing ends.
Although the program is designed to be remotely controlled, this event handler checks for a right-arrow keypress. If a playlist is active, this will direct the playlist manager to skip to the next visualization.
After that, a silence-detection routine is called. The actual detection process is something which the eyecandy library does continuously. This code looks for either a short-duration or long-duration silence. The actual durations (and behaviors) are controlled by configuration, but the short-duration can instruct the playlist manager to skip to the next visualizer, and a long-duration can trigger a switch to the built-in idle or blank visualizers. (I haven’t actually used this long-duration silence feature myself. The thinking was to reduce processing load if somebody stops the music but leaves the program running but a better implementation might be to simply pause the running visualization, and perhaps blank the screen if desired.)
If it gets past all those steps, then the playlist manager is given a chance to run its logic. The silence duration (if any) is also passed along so that it can decide whether to advance based on any short-term silence settings from configuration.
Finally, a lock section is entered to check whether a new visualizer has been queued for display. The locking is required because the --load command may have been invoked from the command-line server’s background thread, although this same queuing mechanism is also used from the foreground thread by the playlist manager, simply because it’s convenient and the locking overhead is negligible (a reasonably formalized test I found which was performed in 2020 demonstrated .NET 5.0 was capable of entering and exiting 2.5 million no-operation locks per second). If a new visualizer is queued, it will be passed to the rendering manager for preparation and display.
OnResize
This simply invokes a rendering manager method with the new viewport sizes. I’ll talk about why this is necessary a bit later.
Playlist Management
In the version 2 release, PlaylistManager is relatively simple, but some of the features I’m planning to add will add enough complexity to warrant a stand-alone manager.
There is no constructor. Instead, the application calls StartNewPlaylist which simply loads the configuration file, which also generates a complete playlist with any requested randomization rules applied. Then a “next visualizer” pointer is reset, the visualizer is loaded, and that’s the bulk of the manager’s work completed.
Skipping ahead in the playlist via a call to NextVisualization involves further processing of the pre-generated playlist sequence. A temporarilyIgnoreSilence flag is provided to suppress silence-based advancement for a short period, which guards against rapidly advancing through the playlist if the audio happens to have a series of closely-timed quiet periods.
The UpdateFrame method is called by the main window’s OnUpdate event handler. It gives the playlist manager a chance to decide whether to switch to another visualizer based on any configured short-period silence behaviors, or a simple elapsed time setting.
Cache Management
The Caching static class stores a variety of data.
Two read-only lists are used for validation: KnownAudioTextures and KnownVisualizers. Their names are self-explanatory. In practice, the audio texture list isn’t strictly necessary because version 2 simply loads and runs all available audio textures, but it may become useful again with some of the future changes I have in mind. Similarly, the visualizer list was more about future plans since there are currently only two visualizer classes, but the longer I work with the program, the less certain I feel there will be value in additional visualizer types. Call it an open question (and if any readers have thoughts or ideas, please do share).
Shader caching is fairly interesting. The program defines a simple CachedShader class which inherits from the Shader utility class in the eyecandy library. Spinning up a new OpenGL shader involves loading two files (the vertex and fragment shader source code), parsing and compiling the source files, running a linker operation, and some eyecandy housekeeping relating to attribute and uniform names and locations. This is enough overhead (especially if the files are loaded across the network, my NASes spin down their drives after only five minutes) that caching was beneficial.
There is a simple <name, Shader> dictionary for the three internal shaders, and also VisualizerConfig instances for the two which have .conf defintions, but the other cache named Shaders warrants some discussion.
The Shaders collection type is CacheLRU which stands for Least Recently Used. This type of cache has a fixed size, and when it reaches this size, the oldest item is removed when a newer item is added. This collection is custom code. There is at least one discussion on Github going back many years about providing a built-in LRU collection type, but after working with this implementation, I’m not sure a framework-level collection would help.
Before I talk about the LRU cache, I want to sidetrack momentarily into the subject of cache keys. The program generates keys by hashing the vertex and shader pathnames using an algorithm called Murmur3. This algorithm is optimized to somewhat long text strings and produces a fairly convenient 128-bit integer as the output. Although .NET doesn’t have a real 128-bit integer yet (.NET7 has a struct representation), Microsoft appears to be on-track to deliver true value-type support in the future. Currently the application uses the BigInteger struct since the app is on .NET6 rather than .NET7.
The LRU cache has the methods you’d expect: Get, TryAdd, ContainsKey, Remove and a variation on the common Clear method called DisposeAndClear. A compiled OpenGL shader represents multiple unmanaged resources, so proper disposal is important. Thus, the constructor checks the TValue type for IDisposable and sets a flag. If the cached content is disposable, these methods will invoke Dispose before removing any object from the cache.
In terms of implementation, the LRU cache is simply a generic dictionary combined with a linked list. The linked list is the “real” storage location, and the dictionary is used as a keyed lookup mechanism which stores those linked list objects.
Finally, the Caching class has an OpenGL-related field called MaxAvailableTextureUnit which I will talk about shortly.
Rendering Management
Four key components play into the rendering process. RenderManager orchestrates the whole process, several IRenderer classes handle most of the OpenGL calls for each frame, GLResourceManager allocates and releases a variety of unmanaged OpenGL resources needed by the renderers and shaders, and various utility functions are provided through the RenderingHelper class.
Like any good manager, RenderManager is focused on making sure all the other parts are able to get their jobs done. It exposes a reference to a singleton GLResourceManager object and a pair of IRenderer objects named ActiveRenderer and NewRenderer.
The PrepareNewRenderer method takes a VisualizerConfig instance and creates an IRenderer instance appropriate to the visualizer configuration. If no renderer is active, this immediately becomes the active renderer, otherwise it is stored as the new renderer instance. Pretty simple.
The RenderFrame method starts by checking whether NewRenderer points to an object. If so, and if crossfade is not enabled, it simply diposes the active renderer, swaps in the new one, and starts running that instead.
When crossfade is enabled, things get a bit interesting. Crossfade is itself a special case of the IRenderer interface and also a special case of multi-pass rendering. Instead of taking a visualizer configuration as the constructor argument like the other two renderers, this takes requires references to two other renderers – namely the currently-active and newly-queued renderers. Meanwhile, RenderManager “forgets” about those two renderers, and Crossfade itself temporarily becomes the active renderer as far as RenderManager is concerned.
I will write more about how cross-fading “really” works in my next article about multi-pass rendering, but it essentially runs the visualizers and shaders for both renderers for each frame.
Their output is sent to OpenGL textures attached to OpenGL framebuffer objects (“how” will also be covered in the next article), then a crossfade shader mixes the output of each renderer: the active renderer’s shader output is progressively dimmed while the new shader is progressively revealed (over a period of 2 seconds, by default).
Once the crossfade operation has finished, the active renderer is disposed, and a simple callback to RenderManager establishes the already-running new renderer as the active one.
One interesting change in version 2 is that each renderer maintains its own Stopwatch instance for setting the shader time uniform. In version 1.x, the app window owned a single clock. There are two related problems with this. We don’t want to let the clock run indefinitely, many shaders with time-based math will develop weird artifacts (aka bugs…) if the elapsed time value becomes very large. Therefore, version 1.x would reset the clock every time a new visualizer was loaded.
However, with crossfade support in version 2, the already-running visualizer often exhibited a distracting “hitch” in the output when the elapsed time would reset to zero. This was very visble since, by definition the active (old) shader starts at full visibility, exactly when the incoming shader triggered a clock reset.
The simple solution was a clock in each renderer. They won’t ever accumulate large elapsed time values because the lifespan of a visualization is generally only a few minutes, whereas reports of time-based problems on sites like Shadertoy often involve letting the program run overnight or even multiple days.
In terms of the IRenderer classes themselves, SingleVisualizerRenderer is the easiest to follow. It’s essentially a wrapper around the old version 1.0 window’s OnRenderFrame event handler. The RenderFrame method simply calls eyecandy to set the audio texture uniforms for the visualizer’s shader, sets the resolution and time uniforms, then calls the RenderFrame method on the visualizer object.
The MultipassRenderer is significantly more complex, but as I noted above, I will write about that in the next article.
Visualizer Classes
These are extremely simple classes which exist to pass data to the initial vertex stage of the shaders. They pre-date both Monkey Hi Hat and the eyecandy library, otherwise I’d have probably named them something which more appropriately describes their purpose … “visualizer” is sort of misleading considering the minor role they play in the overall process.
Most graphical shaders deal with two parts of the pipeline – vertex data (all the points that make up 2D and 3D shapes) and fragment data (for our purposes, “coloring” the areas of the viewport that are covered by those shapes). These classes deal with the vertex data.
The easiest one to understand is VisualizerFragmentQuad. It has “fragment” in the name because it is oriented to shaders that are primarily concerned with the fragment part of the pipeline. Everything on Shadertoy is an example of this. Fragment shader code is executed for every pixel in the viewport because the vertex data defines shapes that cover the whole viewport. In the current implementation, this is done by defining two rectangles which, back-to-back, define a rectangle. (The helpful folks in the OpenTK discord chat have told me about two optimizations which I will apply in a future release, but in general the point is that a single 2D geometry overlaps the entire viewport.) Even though the focus is the frag shader, a vert shader is still required, so typically these visualizers use an “off-the-shelf” shader which does nothing but pass the vertex buffers through unchanged. The visualizer content available in the app’s release archives generally shares VisualizerFragmentQuad.vert for this purpose.
The other one is a little strange. VisualizerVertexIntegerArray is meant to mimic the vertex-shader-oriented code on the VertexShaderArt website. The gentleman who owns that site devised a unique spin on vertex shaders. There is no rule that says a vertex shader must receive vertex data from the program – it really only has to output vertices. As the name suggests, the input to these shaders is simply an arbitrarily-long sequence of zero-based integers. If you ask for 1,000, the program will run 1,000 times (in parallel on the GPU), and each copy will get a number from 0 to 999, plus a uniform indicating the total count of 1000. Then it’s entirely up to the shader where that vertex (pixel) ends up on-screen – you have 1,000 of them to play with, however you want. Like the other visualizer class, since this one is primarily concerned with the vertex side of the pipeline, the off-the-shelf content shares a frag shader of the same name, VisualizerVertexIntegerArray.frag, which just passes-through the color that came from the custom vert shader.
Managing OpenGL Resources
The last aspect I’ll mention is the GLResourceManager class. These shaders rely on three OpenGL resources which are allocated and de-allocated by this class: textures, framebuffers, and texture units. There are additional resources such as shader programs and the various vertex-related buffers and objects, but they’re encapsulated elsewhere. This class focuses on textures, framebuffers, and texture units because use of those resources has to be coordinated among multiple resource users. The version 1.x release put a lot of this work on the application user (or at least, the person writing visualizer configurations and shaders), and the enhancements I wanted to add for version 2 made those requirements unreasonable at best.
Usage is pretty simple. A resource consumer generates a GUID that is the permanent “owner name” for that object, and sends this and a number to the CreateResources method. The return is a read-only list of GLResources objects matching that number. Each of those objects has five properties.
Index is a zero-based ordinal identifying the resource (if you request 10 resources, you’ll get back index 0 through 9).
BufferHandle is the integer handle to an OpenGL framebuffer object (FBO).
TextureHandle is the integer handle to an OpenGL viewport-sized RGBA texture attached to that FBO.
TextureUnitOrdinal and TextureUnit are related. In OpenGL, the texture unit is a sort of “memory slot” on the graphics card where a texture is stored (why the texture handle doesn’t cover this is a big mystery to me). Originally OpenGL required at least 16 texture units, and supported up to 32, so the TextureUnit enum defines Texture0 through Texture31. But as time went on, graphics cards added more and more memory. Today my graphics card reports it can support 192 texture units. The OpenGL API folks stopped adding enums, so the common practice is to store an integer (the TextureUnitOrdinal) and cast it as a TextureUnit enum for those API calls that require enums, even though 33+ are not formally defined as enum members. (Technically, it’s slightly more complicated; you also have to cast Texture0 as an int and add that to the ordinal since the underlying integer value of Texture0 isn’t zero, for some bizarre reason.)
While FBO and texture handles can be generated on the fly, Texture units are essentially a “scarce resource” which must not overlap in usage, and multi-pass shaders in particular will need a handful of them. Additionally, the eyecandy library (as of version 2) internally assigns seven of these to the audio textures on a permanent basis, which must be accounted for. In order to avoid collisions with the library user, these are assigned fron the top end of the range (so for my card’s 192 available texture units, numbers 185 through 191 are reserved for audio textures). This is why the Caching class has the MaxAvailableTextureUnit field – for my GPU, that value will be 184 because anything higher will interfere with the eyecandy audio textures.
To make a long story short, since these are all somewhat related, and are needed at the same time, it was easiest to just offload the handling into a single centralized manager. When the resource consumer is done, it merely calls DestroyResources with the name GUID and leaves the rest to the manager object. It isn’t necessary to dispose the resources or anything of that nature, that’s handled within the GLResourceManager class.
Conclusion
This article was fairly long, but hopefully by this point readers will have a better understanding of the inner workings of the Monkey Hi Hat program. As I mentioned earlier, in the next installment I’ll talk about how multi-pass and crossfade rendering works, and then I’ll wrap up the series with an article about the .NET MAUI-based Monkey Droid remote-control GUI.

Comments